AI Trend

Table of Contents

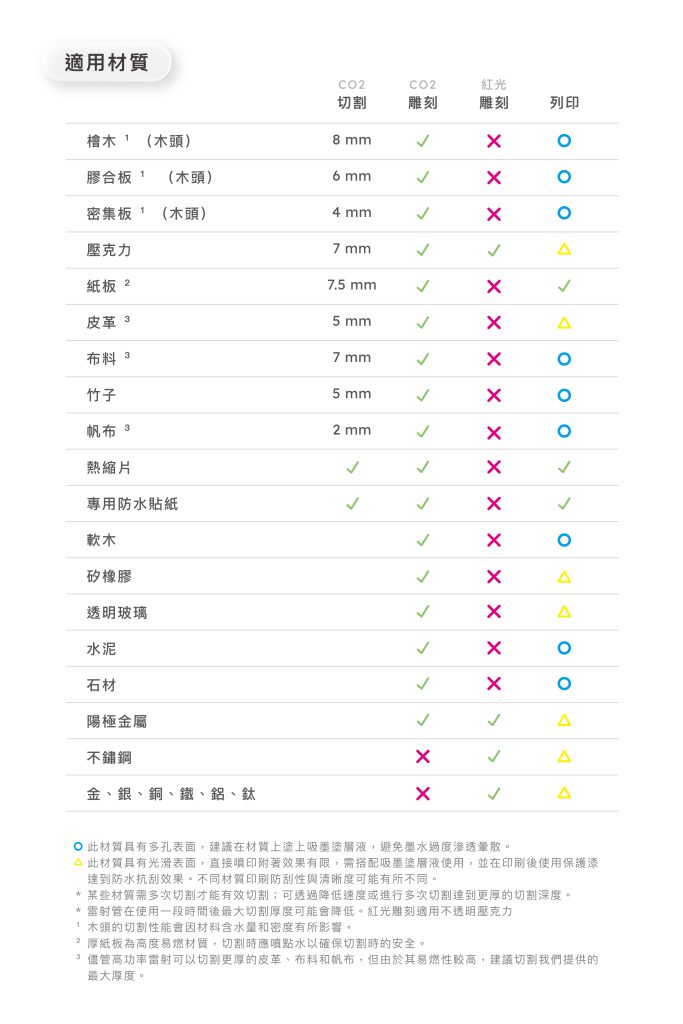
AI technology is advancing rapidly, driving automation in business applications. More people are discovering that AI can do much more than write articles or analyze data—it can generate professional-level designs and be applied in creative fields like laser engraving and color printing. This technology not only simplifies the design process but also empowers users without a design background to easily create beautiful and practical products.

In this article, we’ll show you how to use ChatGPT to generate custom designs and pair them with FLUX Ador to create exclusive holiday packaging. Whether you’re a beginner in design or a small business with a tight budget, this article provides a simple and efficient solution. Let’s dive into this innovative and practical design method together!

How to Use ChatGPT to Create Laser Engraving Designs

The gift-giving season is right around the corner, with Halloween, Christmas, and other big holidays coming up. To stay competitive, many businesses roll out special holiday packaging or gift boxes. But outsourcing large print jobs can get expensive, and once the holiday’s over, that packaging is often useless. For small and medium-sized businesses, that’s a tough expense to justify. Enter FLUX with the ideal solution. With the Ador laser cutter, you can use AI to create custom holiday packaging, even if you’re not a designer. It’s a game-changer—cutting down on costs and helping your products stand out in a crowded market while giving your customers something to get excited about!

ChatGPT DALL-E 3 Image Generator

OpenAI’s DALL-E 3 is a powerful image generator known for its precision and creativity, capable of turning text descriptions into intricate scenes and detailed illustrations. Its advanced features make it perfect for generating unique designs and converting them into laser cutting patterns. With a user-friendly interface and high-quality outputs, both professionals and hobbyists can easily dive in. Since DALL-E 3 is integrated with ChatGPT and offers a broader range of functions, it comes with a higher price tag, with a monthly fee of about $20—ideal for users who regularly take advantage of ChatGPT’s diverse capabilities.

Step 1 ChatGPT Text to Image

To gear up for the upcoming Halloween season, we used ChatGPT to create a series of cake packaging designs featuring Halloween elements. The process of generating images with ChatGPT is incredibly simple—just type your desired design description into the chatbox. Keep in mind, the more detailed your input, the closer the generated image will match your vision!


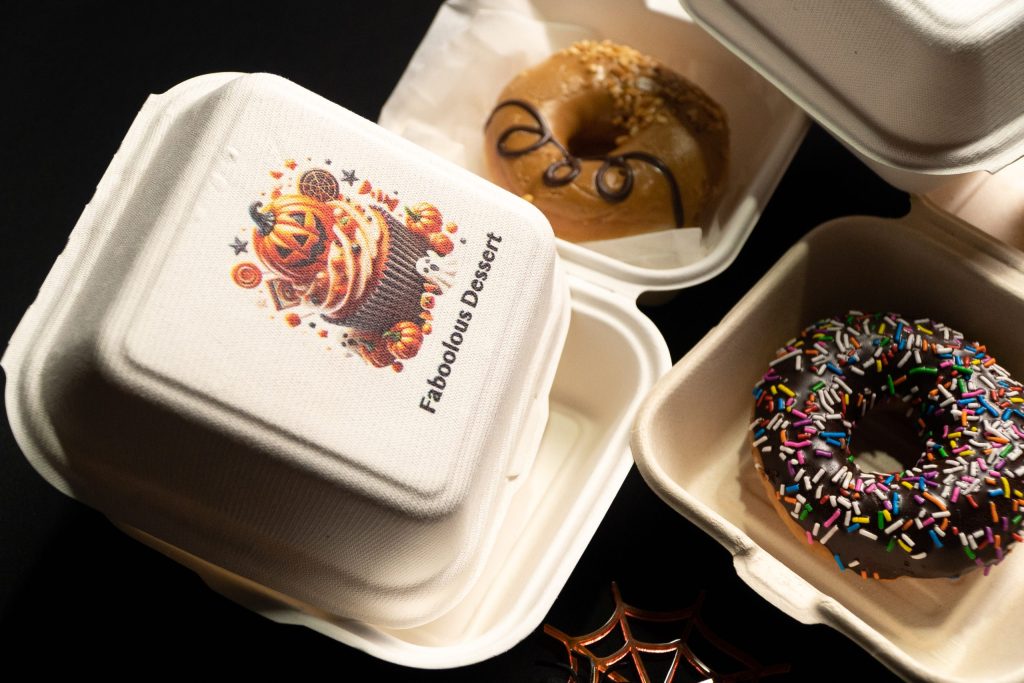
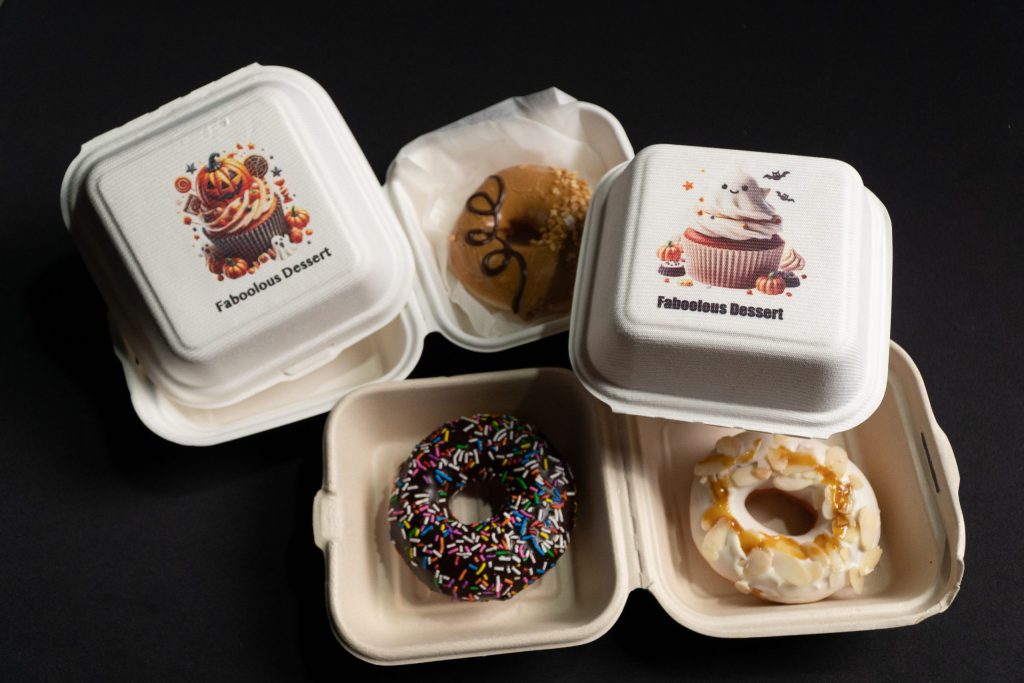
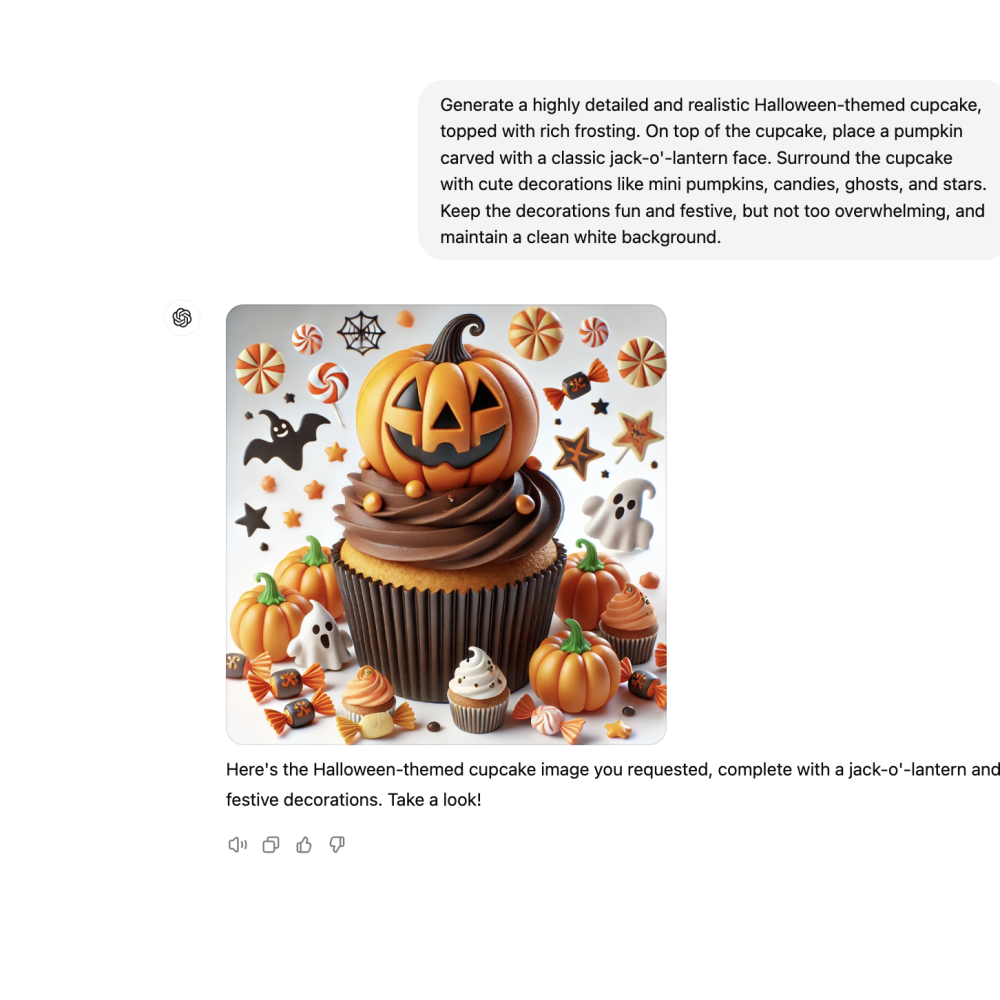
The theme was to create Halloween cake boxes, so we asked ChatGPT to generate a design for a pumpkin cupcake. To make the design more detailed and vivid, we input the following prompt: “Generate a highly detailed and realistic Halloween-themed cupcake, topped with rich frosting. On top of the cupcake, place a pumpkin carved with a classic jack-o’-lantern face. Surround the cupcake with cute decorations like mini pumpkins, candies, ghosts, and stars. Keep the decorations fun and festive, but not too overwhelming, and maintain a clean white background.”

ChatGPT produced an image rich in elements and vibrant colors, perfect for color printing. After downloading the file, we’re ready to print it on the cake box packaging!


Once you’ve downloaded the image file, simply import it into FLUX’s laser collaboration software, Beam Studio. Beam Studio comes with an AI background removal feature, which helps users easily remove the background from AI-generated images, ensuring clean engraving or printing on objects. After importing the file, just select the “Background Removal” option from the left toolbar to complete the process.

Step 3 Camera Preview

FLUX Ador comes equipped with a camera preview feature, allowing creators to easily capture an image of the object within the working area and align the design file with the object. By clicking the camera icon in the upper left corner of Beam Studio, you can view a preview on the screen. From there, simply drag and drop the design to the desired printing position for precise material alignment. If you’d like to add a brand name or custom text to the packaging, you can use the text tool in the left toolbar of Beam Studio. After entering your text, choose a font, and drag it to the desired position for printing. For more details on installing the color printing module and using the camera preview function, check out the video below:

Step 4 Color Printing Setting

The Ador color printing module uses mixed color printing technology, paired with CMYKW eco-friendly inks, to perform inkjet printing on thicker materials. In Beam Studio, users can adjust the color saturation to their preference. For example, with the Halloween-themed design generated by ChatGPT, we wanted the pumpkin to have a more orange tone rather than red. To achieve this, we lowered the red saturation and increased the yellow. For detailed settings, check out the video below:
We also asked ChatGPT to generate several more Halloween-themed designs, and they turned out adorable and detailed on the cake boxes. With Ador’s amazing capabilities, businesses needing custom packaging no longer have to worry about the limitations of outsourcing mass production. With Ador, you have full control to customize however you like. Join us now and make your brand stand out in the year-end gifting rush!

Ador

The World’s First Color
Printing Laser Cutter

beamo

The World’s Smallest
CO2 Laser Cutter/Engraver

Beambox

The Smart Desktop
Laser Cutter & Engraver

HEXA

Beyond
Your Profession