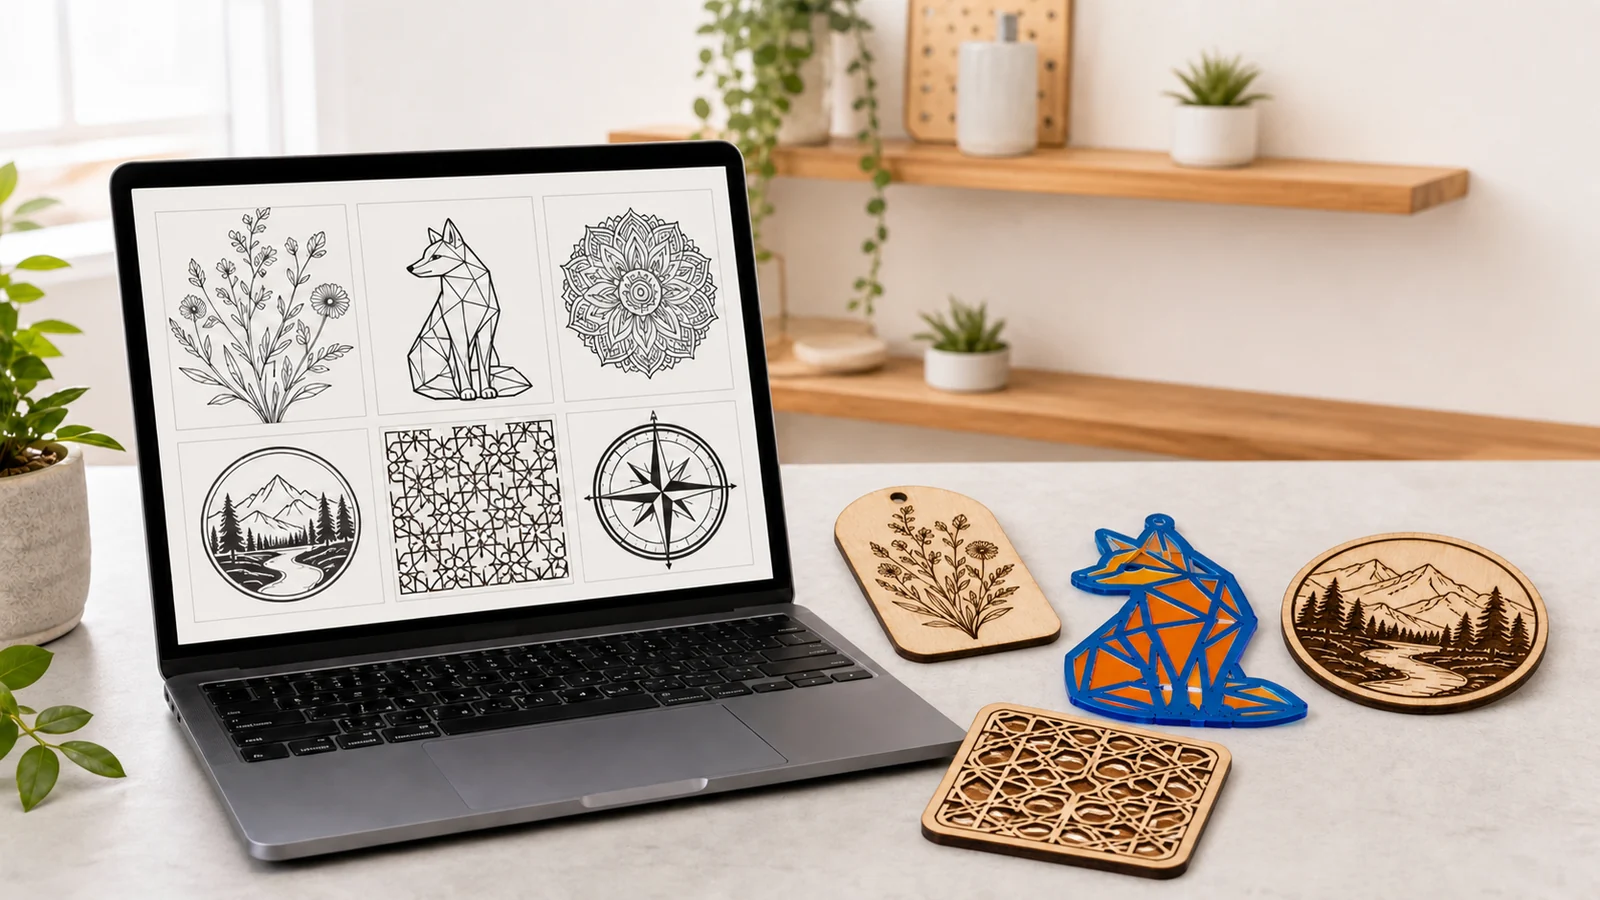
AI-generated images can do more than provide inspiration. With the right tool and file format—and a careful cleanup pass—you can turn an image into artwork for laser engraving or cutting. This 2026 guide compares five practical tools, explains what each one does best, and shows what to check before importing a file into Beam Studio.
Five AI Image Generators: Quick Comparison
Start with the object you want to make. Photo engraving depends on image quality and tonal range, while acrylic or wood cutting calls for clean vector paths that can be inspected and edited.
| Tool | Best for | SVG/vector | Main limitation |
|---|---|---|---|
| ChatGPT Images | Conversational editing, black-and-white line art, product concepts | No; usually raster output | Small details and text can distort, and cut paths must be rebuilt |
| Adobe Firefly | Brand exploration, vector motifs, reusable design assets | Vector workflows can generate and export SVG | Features and commercial terms vary by account, plan, and tool status |
| Recraft | Icons, sticker-style graphics, line art, SVG cut files | Supports SVG | Free-plan ownership and commercial-use rights are more restrictive |
| Google Gemini | Reference-image edits, scenes, photo and grayscale engraving sources | No; primarily raster output | Complex compositions are rarely ready for fabrication as generated |
| Canva Magic Media | Fast layouts, social mockups, placing generated art into campaigns | Depends on the asset and download plan | A visual layout is not a fabrication path and still needs cleanup |
Five AI Tools for Laser Projects
1. ChatGPT Images: Refine Artwork Through Conversation
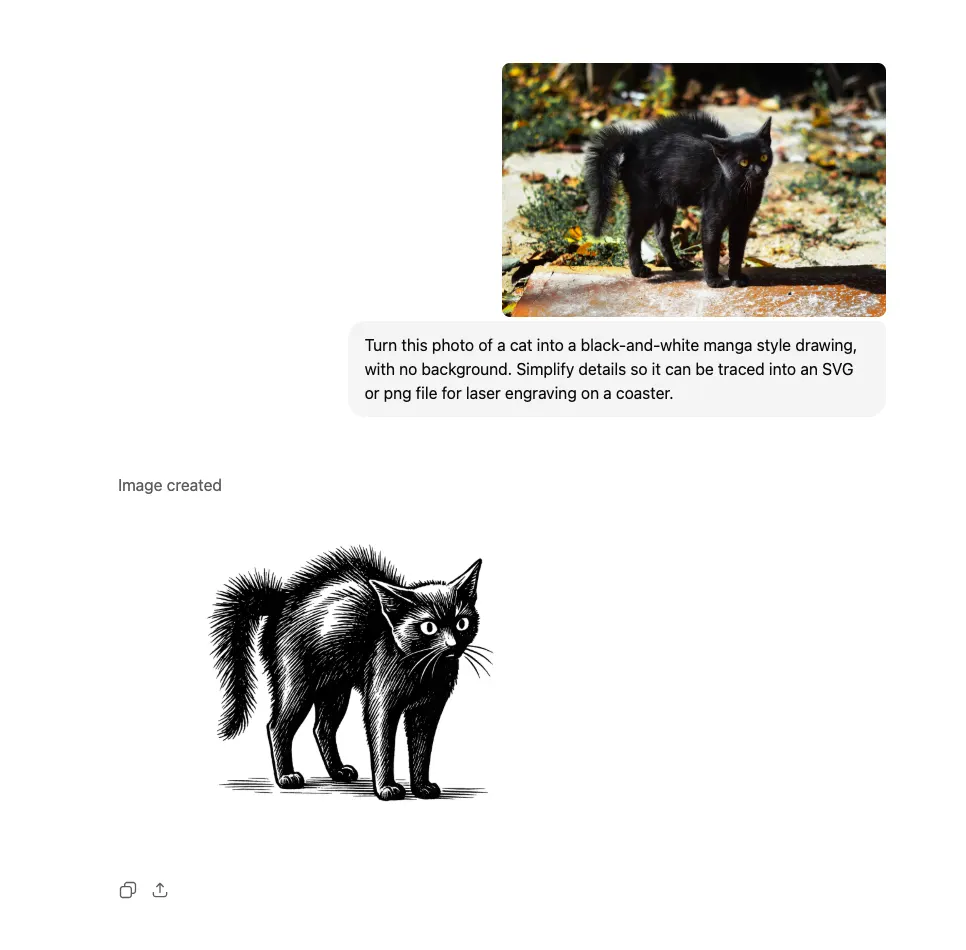
ChatGPT Images lets you adjust composition, line weight, contrast, and background with natural-language follow-ups. You can also upload an existing image and request targeted edits, making it useful for black-and-white engraving art, simple icons, and early product concepts.
Good project fits: grayscale pet portraits, bold line illustrations, commemorative plaques, and tag concepts.
Advantages
- Continue asking for simpler lines, a removed background, or stronger contrast in the same conversation.
- Upload a reference image and preserve the features that matter to the project.
- Request a transparent background or a specific aspect ratio for easier layout work.
Limitations
- The result is still a raster image, not a ready-to-cut vector path.
- Small text, repeated details, and intersecting lines can contain artifacts.
- The same prompt does not guarantee an identical result every time.
How to use it
- Describe the subject, material, and process—for example, “a botanical moth to engrave on plywood.”
- Add fabrication constraints such as white background, bold clean lines, no shadows.
- Ask it to remove tiny textures, clarify the silhouette, and leave space around the subject.
- Download the highest-resolution result, then crop, remove the background, and convert it to black and white if needed.
Output and Beam Studio: import PNG or JPG for engraving. For cutting, trace or redraw the shape as vectors and inspect every node before production. See the official ChatGPT Images guide.
2. Adobe Firefly: Visual Exploration with a Vector Workflow
Adobe Firefly is a natural fit for creators already working in the Adobe ecosystem. Alongside raster image generation, its vector workflow can produce scalable graphics for brand motifs, repeating patterns, and simple cut designs.
Good project fits: brand icons, packaging decoration, acrylic stand silhouettes, and repeating patterns.
Advantages
- Turn text prompts into vector graphics with editable shapes and colors.
- Continue cleanup in tools such as Illustrator.
- Create a family of icons or decorations with a consistent direction.
Limitations
- Generated SVG files may contain overlaps, masks, or more nodes than a laser file needs.
- Feature access and generation allowances can change.
- Always confirm the current plan terms and the rights to any source material.
How to use it
- Choose the text-to-vector workflow and describe one subject with a clear outer contour.
- Limit the palette and avoid gradients, shadows, and very small decoration.
- Download the result as SVG, then expand text and strokes in a vector editor.
- Remove hidden or overlapping objects and make sure every cut contour is closed.
Output and Beam Studio: use SVG to preserve cut lines, or PNG/JPG for engraving. Simplify nodes, set real dimensions, and separate engraving and cutting layers before import. Learn more from Adobe’s official vector generator overview.
3. Recraft: SVG Output and Consistent Icon Styles
Recraft focuses on editable vector graphics and style consistency. It is especially useful when you need a coordinated set of icons, signs, tags, or layered acrylic pieces.
Good project fits: monochrome icons, sticker-style artwork, tag outlines, and layered acrylic stands.
Advantages
- Generate editable SVG files that stay sharp at any size.
- Control color and visual style across a product series.
- Simple line art and icons are generally easier to prepare than photorealistic scenes.
Limitations
- Vector results can still include double lines, orphan nodes, or tiny fragments.
- Free-plan ownership and commercial-use rights differ from paid plans.
- Complex, photorealistic subjects do not always become practical cut structures.
How to use it
- Select a vector-generation mode and begin with one subject, a limited palette, and closed shapes.
- Request a front view, no background, no shadows, and bold lines.
- Export SVG, ungroup the objects, and remove duplicate paths and the background.
- Separate engraving areas from the outer cut contour and set the final dimensions.
Output and Beam Studio: SVG is the preferred format. After import, check for open paths, duplicate lines, and details that are too small for the chosen material. Review the Recraft vector generator and its commercial-rights documentation.
4. Google Gemini: Reference Edits and Scene Exploration
Gemini can explore a composition from text or reference images and refine the result through follow-up instructions. It is useful for preparing photo-engraving sources and visualizing a product in context.
Good project fits: grayscale portraits, pet engravings, product mockups, and reference-image variations.
Advantages
- Use multiple reference images to communicate a subject or setting.
- Adjust composition, background, and aspect ratio through conversation.
- Quickly test how a finished object might look in a lifestyle scene.
Limitations
- Output is primarily raster artwork rather than a ready-to-cut SVG.
- A mockup may show impossible proportions, joints, or material effects.
- Available models and features vary by account, region, and plan.
How to use it
- Upload a clear source image and identify the features that must remain recognizable.
- Request a clean background, high contrast, a front view, and clear edges.
- For engraving, ask for grayscale treatment and reduced background noise.
- Download and crop the result, remove the background, and test the tonal range on a small sample.
Output and Beam Studio: import PNG or JPG and test grayscale, threshold, or dithering modes. Use scene mockups only for visualization, not as production files. Current features are documented in the official Gemini image guide.
5. Canva Magic Media: Fast Layouts and Product Mockups
Canva Magic Media helps non-designers generate an image and place it directly into a social post, campaign layout, or product presentation. Its strength is fast visual communication rather than precision path construction.
Good project fits: lifestyle mockups, campaign graphics, packaging proposals, and social content.
Advantages
- Place generated visuals directly into Canva templates.
- Test product colors, settings, and marketing compositions quickly.
- Offer an approachable workflow for users who do not work in professional image editors.
Limitations
- The visual result is not a laser-cut path, even when the preview looks clean.
- SVG downloads and certain features depend on the asset type and plan.
- People, characters, brands, and uploaded assets still require appropriate permission.
How to use it
- Describe the product, material, and setting in Magic Media.
- Choose a simple background and leave room for a headline or call to action.
- Add the result to a layout and adjust crop, size, and brand colors.
- For fabrication, export the isolated subject and prepare it separately as PNG or SVG.
Output and Beam Studio: PNG/JPG can be used as engraving sources. SVG availability depends on the actual elements and plan, and every imported path still needs inspection. See the official Magic Media guide.
Choose the Tool by Project Goal
| Project goal | Start with | Prepare before fabrication |
|---|---|---|
| Photo or grayscale engraving | ChatGPT Images, Gemini | Crop, remove the background, raise contrast, convert to grayscale, and test |
| Black-and-white line engraving | ChatGPT Images, Recraft | Remove noise and background; verify the minimum line width |
| SVG cutting | Recraft, Adobe Firefly | Remove overlaps, close contours, and set size and cut order |
| Product mockup | Canva, Gemini, ChatGPT Images | Use it only as a preview; build a separate production file |
| Brand icons and decorative graphics | Recraft, Adobe Firefly | Check trademarks, source rights, and current commercial-plan terms |
From an AI Image to Beam Studio
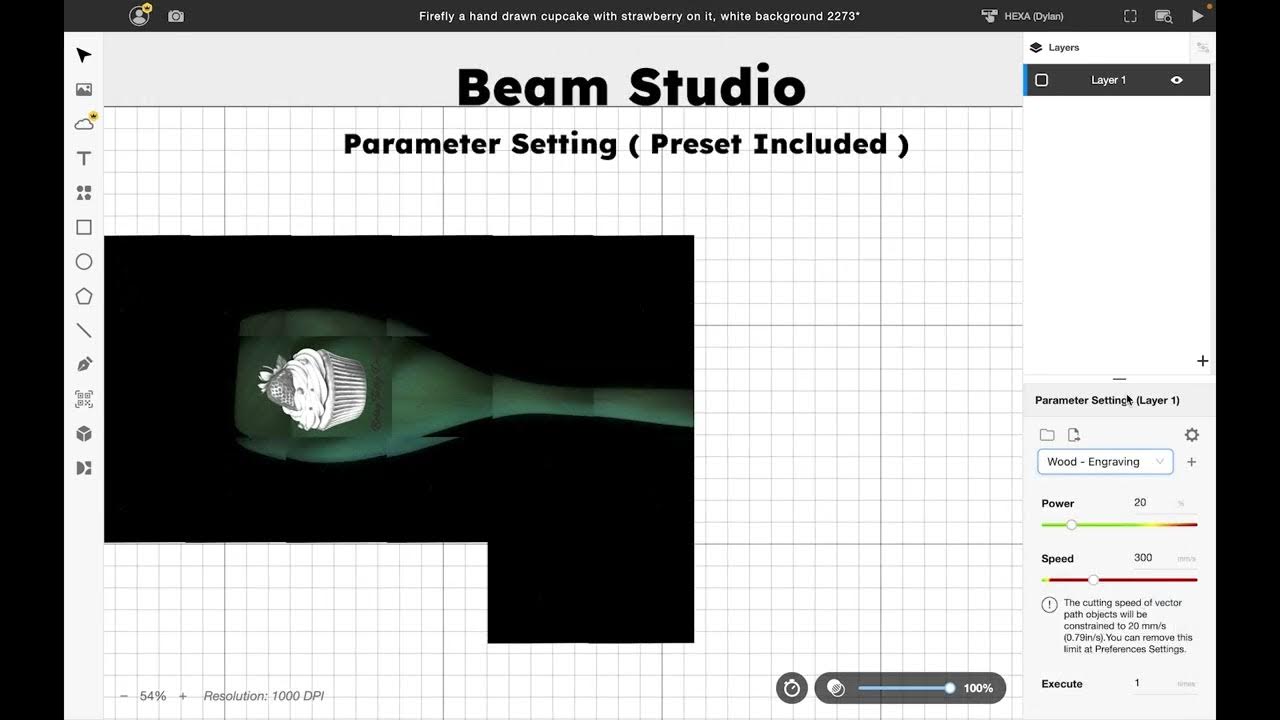
Beam Studio supports JPG, PNG, SVG, DXF, AI, and PDF files. For AI-generated artwork, the most common workflows are JPG/PNG engraving and SVG cutting. A convincing preview is not proof that a file is ready to fabricate: pixels, contrast, contours, nodes, and physical dimensions determine the result.
Workflow A: Engrave a JPG or PNG
- Generate a clean source: ask for high contrast and a simple background. For line art, add white background, bold clean lines, no shadows.
- Clean the image: download the highest-resolution result, crop it, remove the background, and erase artifacts.
- Import into Beam Studio: add the JPG or PNG and size it for the final object without excessively enlarging a low-resolution image.
- Choose an image mode: compare grayscale, threshold, and dithering, then adjust power, speed, and resolution for the material.
- Run a small test: use the same material batch and confirm the tonal range before the full job.
Workflow B: Cut an SVG Vector File
- Generate a simple vector: use Recraft or Adobe Firefly for an SVG with few colors and a clear silhouette.
- Clean the paths: expand text and strokes, then remove the background, hidden objects, overlaps, and orphan nodes.
- Confirm the structure: close every cut contour, check spacing against material thickness, and set real dimensions.
- Import in layers: place engraving and cutting on separate layers and define the process order.
- Preview and test: inspect path direction and duplicate lines, then test on a material offcut.
Required safety check: AI artwork can contain broken lines, duplicate paths, or tiny fragments. Inspect every path and dimension; never send an uncleaned AI output directly to production.
Commercial Use and Copyright: Check Before You Sell
“AI-generated” does not automatically mean unrestricted commercial use. Rights can depend on the platform, account plan, model, prompt, uploaded source material, and local law—and service terms can change.
- Confirm whether the current plan grants commercial rights. Recraft, for example, applies different ownership and licensing terms to free and paid plans.
- You remain responsible for prompts, uploaded images, and final output. Avoid unauthorized logos, protected characters, personal likenesses, and third-party artwork.
- Do not imitate the recognizable style of a living artist. Build your own visual rules and retain prompt, edit, and source records.
- AI output may resemble someone else’s result and may not receive full copyright protection. Run trademark and rights checks before launching a product.
Microsoft Designer can still be a useful alternative for quick ideas and social layouts. For laser-cut SVG files, Recraft or Adobe Firefly remains a stronger starting point—provided you fully inspect and clean the paths.
Turn Your First AI Image into a Laser Project
Begin with bold black-and-white artwork, a clean background, and a clear silhouette. Test it on the same material before adding grayscale detail, multiple layers, or a complex cut structure.
Watch an AI-to-Beam Studio Workflow
This video shows how an Adobe Firefly image can be prepared in Beam Studio for a laser project.